


Factory test method · MD/CD calculator
Dye Sublimation Fabric Shrinkage Test and Size Compensation Guide
Dye sublimation fabric shrinkage is the size change measured after the real heat process. Test machine direction (MD) and cross direction (CD) separately, then use the measured ratio to scale the artwork or cutting size.
There is no single allowance for every polyester fabric, heat press or calender. Temperature, dwell time, tension, construction, heat-setting history and lot can all change the result.
Quick Answer: How Do You Test and Compensate?
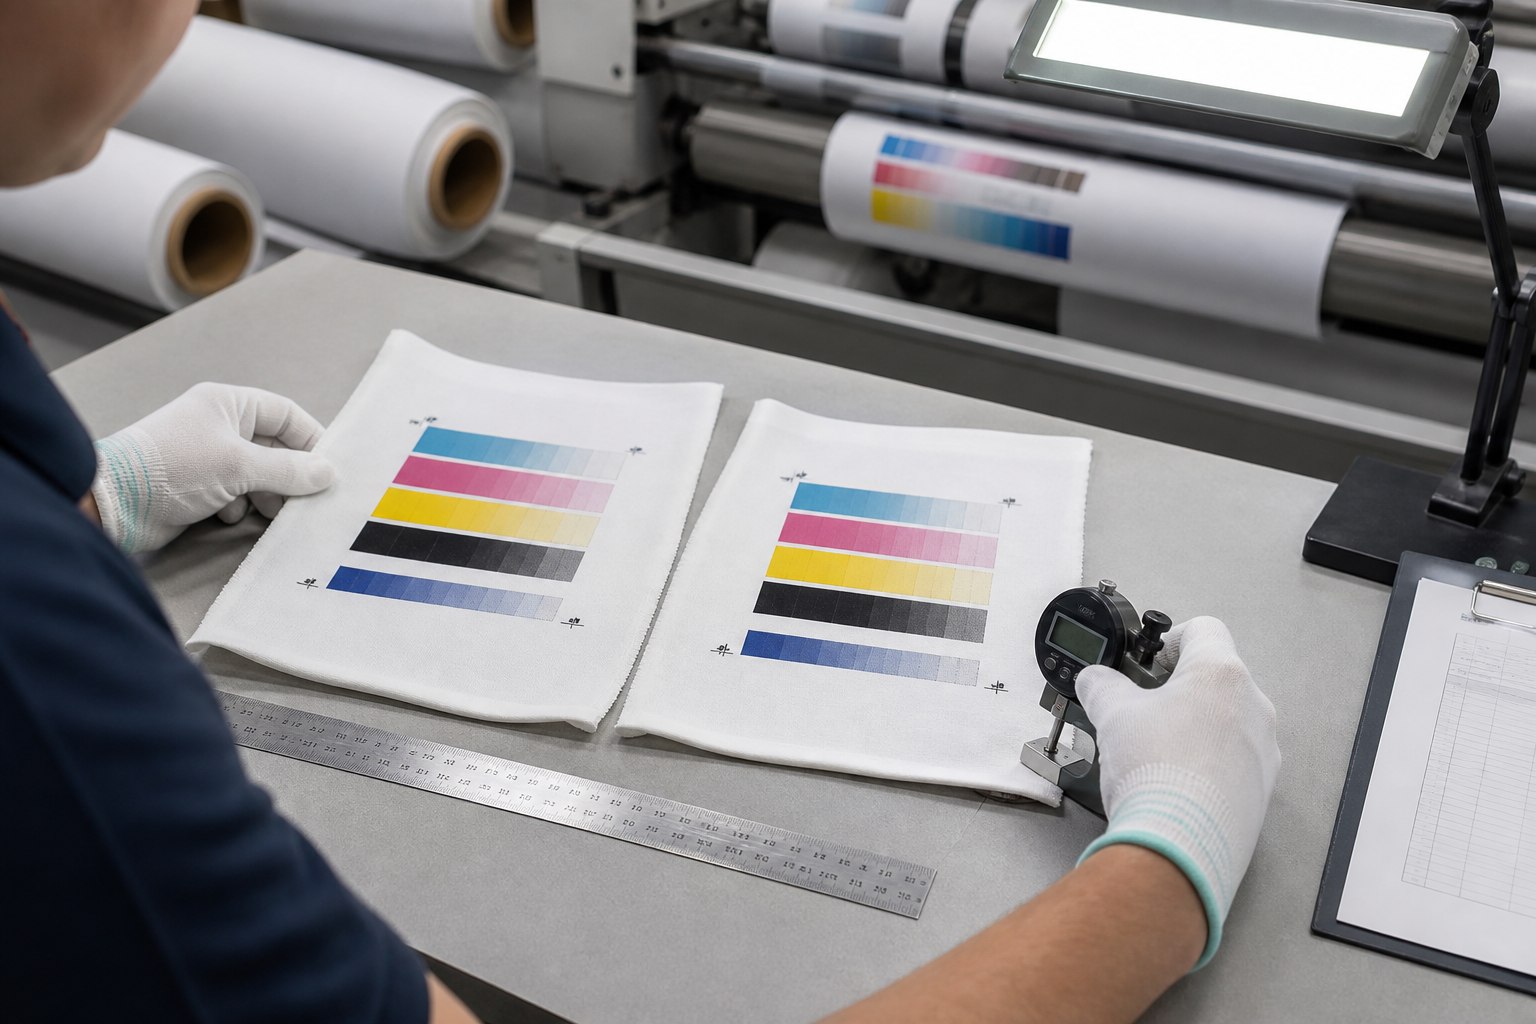
- Mark a 1000 × 1000mm square on the conditioned fabric.
- Label MD along the roll and CD across the roll.
- Run the exact printer, ink, paper, heat, speed and tension planned for production.
- Cool flat. Measure MD and CD at three points.
- Calculate: (before − after) ÷ before × 100.
- Scale each direction by before ÷ after × 100.
- Confirm the result with one full-size finished sample before the bulk run.
Dye Sublimation Fabric Shrinkage Calculator
Enter measurements taken from the same marked test area. Use millimetres or inches, but keep one unit throughout. The calculator runs in your browser and does not send data.
MD and CD Size Compensation
“Shrink” is positive when the sample becomes smaller. A negative value means growth. Add seam, bleed and cutting allowances separately; they are not part of thermal compensation.
The 3 formulas
Shrinkage % = (before − after) ÷ before × 100 Compensation scale % = before ÷ after × 100 Required input size = target finished size × before ÷ afterWhy not just add 2%? A 1000mm sample that becomes 980mm retains 98% of its size. To finish at 3000mm, the exact input is 3000 ÷ 0.98 = 3061.2mm, not 3060mm.
Measure MD and CD Separately
Heat and tension do not always change both directions equally. Keep two results and two scale values.
MD: Machine Direction
Along the roll length. Usually warp on woven fabric and wale direction on knitted fabric.
ROLL FEEDCD: Cross Direction
Across the roll width. Usually weft on woven fabric and course direction on knitted fabric.
WIDTH7-Step Factory Shrinkage Test
- ConditionKeep the labeled roll in the production room before testing. Use 24 hours as a controlled starting point unless your approved SOP states another time.
- MarkMark a 1000 × 1000mm square. Add MD/CD arrows, roll/lot, left-centre-right position and sample number.
- MeasureTake three readings in each direction under light, repeatable measuring tension. Record the average before heat.
- ProcessUse the planned printer, ink, transfer paper if used, heat machine, actual temperature, dwell or speed, pressure and tension.
- CoolLay the specimen flat. Do not pull the hot fabric. Use the same cooling time for every comparison.
- Measure againMeasure the same marked lines in MD and CD. Record all readings, average, range and any curl or wave.
- ApproveCalculate two scale values. Run one full-size piece, finish it and check the real frame, table, wall or sewing pattern.

Wide-roll sampling
- Take specimens from the left, centre and right when full-width uniformity matters.
- Use at least three specimens for an approved condition.
- Report the mean and the range; an average alone can hide edge variation.
- Re-test a new lot, new construction or meaningful process change.
- Set in-process check frequency in the factory QA plan; do not assume one frequency fits every order.
8 Variables That Change the Result
| Variable | What to record | Why it matters | Safe test action |
|---|---|---|---|
| Temperature | Set point and measured surface/blanket temperature | The displayed value may not equal the fabric temperature. | Map actual temperature and keep the measurement method constant. |
| Dwell time / speed | Seconds in a flat press or line speed and heated contact length | More heat exposure can change both colour and dimensions. | Change one factor at a time; approve colour and size together. |
| Pressure / nip | Machine setting and contact condition | Contact and movement can change transfer quality and fabric shape. | Use the equipment and substrate supplier starting point, then test. |
| Machine tension | Fabric, paper, blanket and take-up settings | Hot fabric held under unequal tension may relax to a different size. | Keep the route stable and record every tension change. |
| MD / CD | Roll feed direction and width direction | Construction and machine handling can create directional change. | Never average MD and CD into one compensation number. |
| Heat-setting history | Supplier finish plus any pre-heat or relaxation pass | Heat-set polyester can still change during a later heat cycle. | Compare controlled samples; do not assume “heat set” means zero shrinkage. |
| Conditioning / cooling | Room condition, conditioning time, cooling time and measuring tension | Moisture, temperature and pulling can change the measured value. | Use the same routine before and after each test. |
| Roll and lot | Product code, lot, roll, width position and date | A good first sample does not prove every later lot. | Set a lot approval and in-process verification plan. |
Direct vs Paper-Transfer Sublimation
| Test point | Direct to fabric | Paper transfer |
|---|---|---|
| Real route | Fabric print → drying → thermal fixation | Paper print → paper/fabric alignment → calender or press |
| Extra control | Fabric feed, coating/ink holdout, drying and fixation tension | Paper moisture, paper/fabric movement, blanket and take-up tension |
| Measure | Before printing and after fixation/cooling | Before transfer and after transfer/cooling |
| Approve | Colour, fixation, bleed-through, hand, MD/CD and finish | Colour, sharpness, ghosting, paper marks, MD/CD and finish |
Read the direct dye sublimation fabric guide or the paper-transfer sublimation fabric guide before choosing the print route.
Should You Pre-Heat or Pre-Shrink the Fabric?
Only after a controlled comparison. Supplier heat setting, a print-shop relaxation pass and the final sublimation cycle are different heat histories.
A. No extra pass
Test the normal production route. Record colour, MD/CD size and handling.
B. Controlled pre-pass
Run a labeled sample through the planned relaxation or pre-heat step, then repeat the same production route.
C. Compare
Choose the route that gives repeatable colour and dimensions without adding avoidable cost or damage.
A pre-pass may release residual stress, but it is not an automatic fix for unstable tension, uneven heat or an unsuitable construction.
Batch Test Record
Use one line for each specimen. Keep the record with the approved sample and production job.
| Sample | Product / lot / roll | Position | Route | Temp. | Time / speed | Tension / pressure | MD before → after | CD before → after | Pass / fail |
|---|---|---|---|---|---|---|---|---|---|
| 1 | Left / centre / right | Direct / transfer | |||||||
| 2 | Left / centre / right | Direct / transfer | |||||||
| 3 | Left / centre / right | Direct / transfer |
Shrinkage Troubleshooting by Symptom
| Symptom | Check first | Next controlled test |
|---|---|---|
| MD and CD both high | Actual heat, dwell, construction and heat-setting history | Run a small temperature/time matrix while keeping tension constant; approve colour and dimensions together. |
| MD varies from run to run | Feed, fabric/blanket/paper tension, line speed and take-up | Repeat three specimens with documented tension and cooling. |
| CD varies left to right | Heat and pressure profile, web tracking, edge condition and width relaxation | Test left, centre and right; map temperature across the working width. |
| Sample grows after heat | Stretching under hot tension and inconsistent relaxation | Reduce uncontrolled pulling, cool flat and repeat. Record the result as negative shrinkage/growth. |
| Colour passes; size fails | Do not lower heat blindly | Test a balanced recipe or better-stabilised construction that still meets colour/fixation. |
| Average passes; one edge fails | Range, not only mean | Set an edge-to-edge tolerance and investigate width-profile causes. |
| New lot fits differently | Lot identity and incoming sample | Run the approved method on the new lot before bulk cutting. |
UNISIGN Fabric Options for Shrinkage Testing
A short product list with real images is useful here because construction and application affect the test plan. The percentages below are values currently listed on the linked UNISIGN pages. They are starting specifications, not a replacement for testing your line.

DSP05A
- 150 / 175gsm
- Woven 300D Oxford
- Direct or paper transfer
- Website-listed shrinkage: ≤2%

DSP09
- 230gsm
- Knitted, slight stretch
- Direct or paper transfer
- Website-listed shrinkage: ≤2%

DSP08-T
- 250gsm with spandex
- Two-direction power stretch
- Direct or paper transfer
- Website-listed shrinkage: ≤3%

DSP-BLK-D
- 250gsm
- Printable on both sides
- Direct or paper transfer
- Website-listed shrinkage: ≤2%
Confirm the current TDS, available width, test method and labeled sample for the exact order. For wide jobs, also use the 3.2m dye sublimation fabric guide.
What to Send for a Useful Sample Recommendation
Material and job
- Application and finished size
- Required GSM, opacity and stretch
- Roll width and order quantity
- Frame, sewing or cutting tolerance
Production route
- Printer, ink and RIP
- Direct or paper transfer
- Heat press/calender model and working width
- Current temperature, dwell/speed and tension



Dye Sublimation Fabric Shrinkage FAQs
Does polyester fabric shrink during sublimation?
It can change size during heat fixation or paper transfer. The amount and direction depend on construction, heat-setting history, temperature, dwell, pressure, tension, conditioning and the exact production route.
What shrinkage allowance should I use?
Use the result measured from the exact fabric and production condition. Do not use one allowance for every polyester roll. Calculate MD and CD separately and confirm a full-size finished sample.
How do I calculate fabric shrinkage?
Use: (before size − after size) ÷ before size × 100. A 1000mm line that becomes 980mm has 2.00% shrinkage.
How do I calculate the compensation size?
Multiply the target finished size by before ÷ after. If 1000mm becomes 980mm, the factor is 1.0204 and the RIP scale is 102.04% for that direction.
Should MD and CD use the same scale?
No. MD and CD often change by different amounts. Keep one scale for roll length and one for roll width.
What if the result is negative?
A negative shrinkage result means the sample grew. Keep the signed value, check hot tension and relaxation, then use the measured before/after ratio for compensation.
Does pre-heating stop shrinkage?
Not always. A controlled pre-pass may release residual stress, but it can also add heat history and cost. Compare labeled samples with and without the pass, then approve colour and dimensions together.
How many samples should a factory test?
Use at least three specimens for an approved condition. For wide rolls, include left, centre and right positions. Define lot approval and in-process frequency in the factory QA plan.
When should the shrinkage test be repeated?
Repeat it for a new lot, different construction, important width change, new heat machine or blanket, meaningful recipe change, or any tight-fit job.
Is a listed ≤2% or ≤3% value enough for cutting?
No. It is a useful starting specification, but it may use a different test method. Ask for the current TDS and test a labeled sample with your own printer, ink, paper, heat equipment and tension.
Method Notes and Sources
This guide separates evidence from production approval. Research on heat-treated polyester shows that later heat can still change dimensions, and machine makers emphasise stable textile transport and tension. The final scale value must come from the buyer’s own controlled sample.
Request Fabric Samples for Your Shrinkage Test
Send the application, print route, roll width and heat process. UNISIGN can suggest a short list for line testing.
- Compare woven, display, stretch and blockout options
- Ask for current TDS and website-listed shrinkage data
- Label the sample by product, roll and lot
- Approve colour, MD/CD size and the finished application
Content reviewed 13 September 2026. Product figures were checked against the linked UNISIGN model pages. Confirm the current technical data sheet, test method and labeled production sample for the exact roll.